Softrock Lite II 07_External Connections
External Connections Introduction
External Connections Bill of Materials
Detailed Bill of Materials
| Check | Designation | Component | Marking | Category | Orientation | Notes | Circuit |
|---|---|---|---|---|---|---|---|
| [____ ] | ant | antenna COAX | cable | not furnished with the kit | External Connections | ||
| [____ ] | audio | 2 conductor shielded audio cable | cable | not furnished with the kit | External Connections | ||
| [____ ] | pwr | power leads | cable | not furnished with the kit | External Connections |
External Connections Summary Build Notes
- Install Power Connection
- Install I/Q Audio Cable Connection
- Install Antenna Connection
- Test the Stage
External Connections Detailed Build Notes
Top of the Board
Install Power Connection
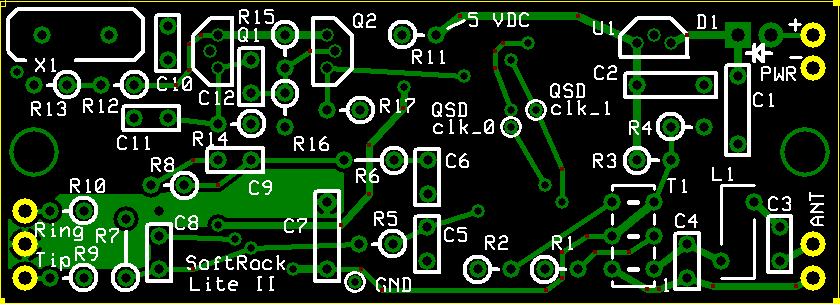
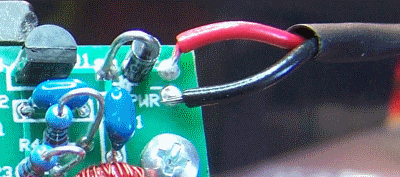
Install the power leads (nominally red for positive and black for negative) to the PWR + and PWR - holes on the upper right-hand side of the board
Use the power jack or plug appropriate to your situation
| Check | Designation | Component | Marking | Category | Orientation | Notes |
|---|---|---|---|---|---|---|
| [____ ] | pwr | power leads | cable | not furnished with the kit |
Install I/Q Audio Cable Connection
Cable
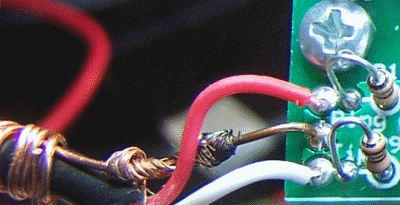
A stereo audio cable may be connected at this time to the board at the three plated through-holes along the lower left edge of the board near the lower left corner.
Strain Relief
Use a short piece of #22 bus wire to connect the middle plated through-hole (ground) to the shield (barrel) of the cable and wrap the end of the bus wire around the outside of the cable several turns for strain relief of the cable.Cable Installation
- The tip of the stereo cable plug connects to the plated through-hole that is marked "Tip" on the board. It is the "I" signal
- The ring of the stereo cable plug connects to the plated through-hole marked "Ring" and is the "Q" signal.
Notefor the 30m. 20m, and 15m RX kits
1/3 sub-harmonic sampling does reverse the spectrum. Changing the audio cable connections to the SoftRock Lite circuit board from tip to ring and ring to tip will correct the reversed spectrum so that the SDR software works the same for the higher band receivers as with the lower band receivers.
| Check | Designation | Component | Marking | Category | Orientation | Notes |
|---|---|---|---|---|---|---|
| [____ ] | audio | 2 conductor shielded audio cable | cable | not furnished with the kit |
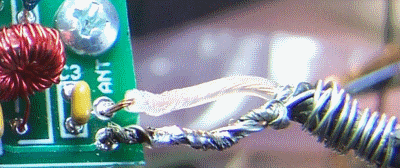
Install Antenna Connection
Antenna Impedance
It is extremely important to use an antenna with as close a match as possible to 50 ohms impedance. The radio's sensitivity is predicated on a 50 ohm antenna input.Coax
Connect a length of 50 ohm coax to the antenna connection on the right edge of the board near the lower right corner. RG-174 is a good fit for this tiny board.- The lower of the two plated through-holes is the antenna RTN connection to the coax shield
- The upper plated through-hole is the coax center conductor connection (ANT IN).
Not Grounded!
Note that this connection is isolated from circuit ground.
You may want to review the series of messages on this subJect in the Softrock 40 Yahoo Group.
Additionally, you should review the materials on the Clifton Labs website concerning the use of an antenna isolation transformer
| Check | Designation | Component | Marking | Category | Orientation | Notes |
|---|---|---|---|---|---|---|
| [____ ] | ant | antenna COAX | cable | not furnished with the kit |
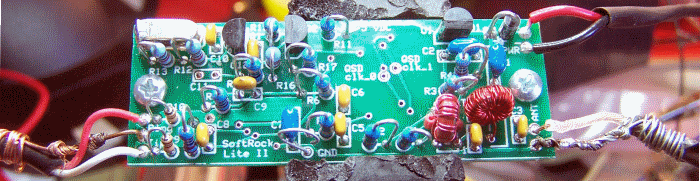
External Connections Completed Stage
Top of the Board